Many people think that installing a mod is as simple as pressing the “Install” button. But in Skyrim, there is a constant “battle” between mods for the right to show you their texture or change the stats of a sword.
In this stage, we will figure out how to manage this chaos.
In Mod Organizer 2, there are two panels, and conflicts work differently in each of them.
Left Panel — Priority / Priority
This is where file conflicts happen.
Here, mods compete over whose meshes .nif, textures .dds, or scripts will get into the game.
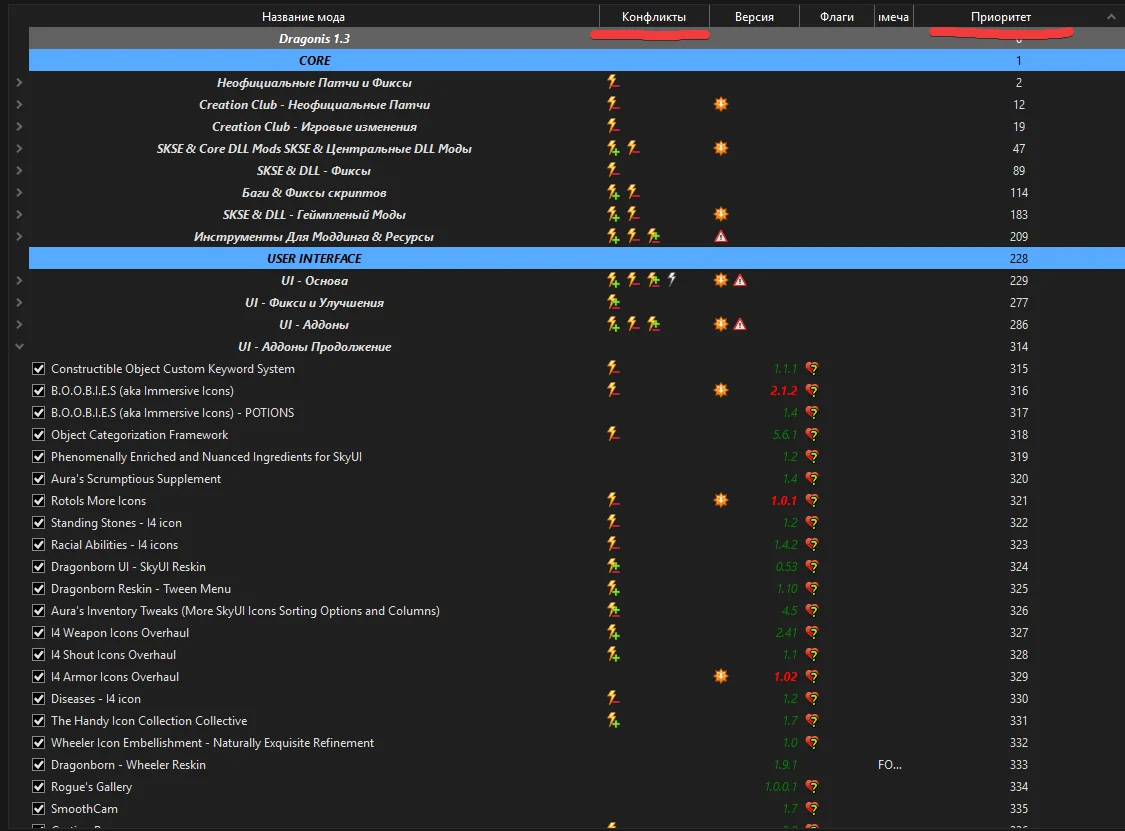
⚡ Lightning bolt with a plus (+):
This mod wins and overwrites the files of the mods above it.

⚡ Lightning bolt with a minus (-):
This mod loses, and its files are replaced.

⚡ Lightning bolt with a plus and minus (+-):
This mod loses and has some of its files replaced, but at the same time it also overwrites another mod.

Rule:
If you want the textures from Mod B to overwrite the textures from Mod A, simply drag Mod B lower in the left list.
Right Panel — Plugins
This is where data conflicts happen.
This panel contains .esp, .esm, and .esl files. They tell the game how much damage a sword has, or what the weather is like in Whiterun.
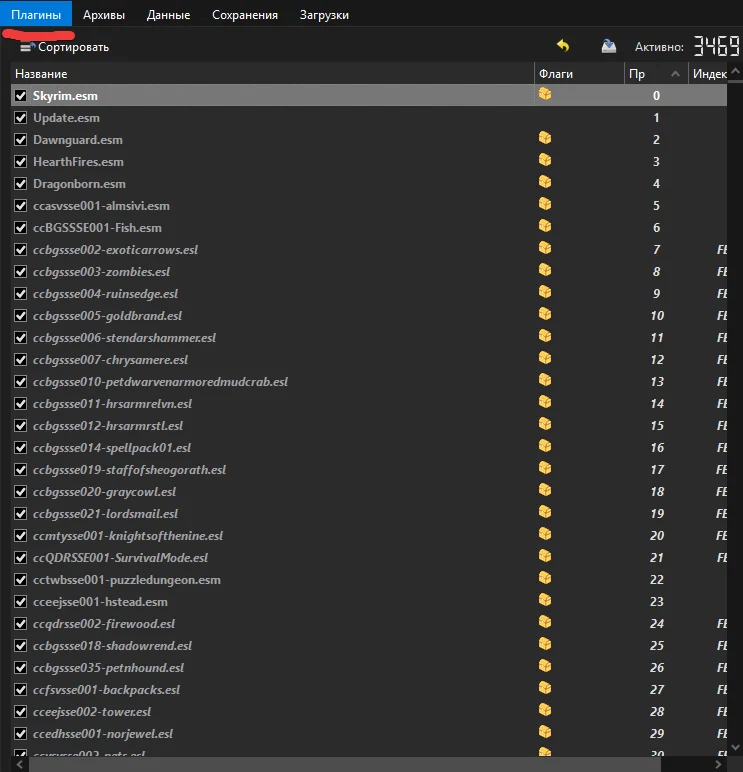
In the right panel, the Plugins tab loads from top to bottom.
The game reads the list like a set of instructions. If two mods change the same thing, Skyrim will only “remember” the instruction it read last.
Imagine that you have three mods installed:
Mod_A.esp — increases the Steel Sword’s damage to 20.
Mod_B.esp — adds a fire damage effect to the Steel Sword.
Mod_C.esp — a random rebalance mod that returns the sword’s damage to its vanilla value of 10.
Situation A
Load order:
A -> B -> CIn the game, the sword will have 10 damage and no fire effect.
Why? Because Mod_C loaded last and overwrote everything that A and B did.
Situation B
Load order:
C -> A -> BIn the game, the sword will have 20 damage and a fire effect.
This is what we need!
LOOT is the industry standard for sorting the right panel.
It knows about thousands of relationships between plugins, but for a serious modlist, its automatic sorting is not enough. Without manual configuration, it may place a patch above the main mod or scatter related plugins across different parts of the list.
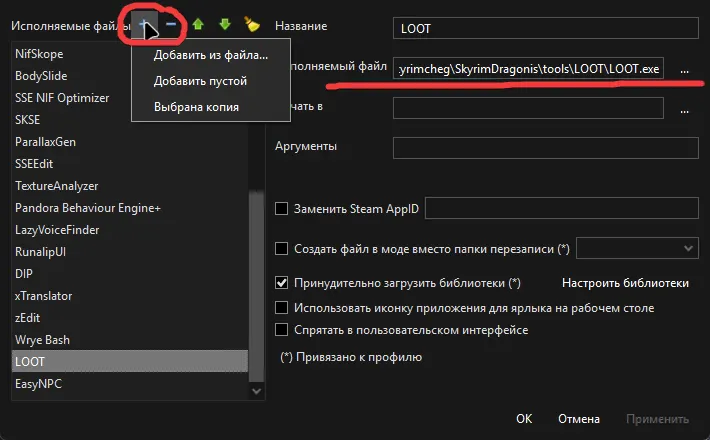
Download the latest version of LOOT.
Install it anywhere you want. For example, I install everything into:
Modlist Folder/tools/Folders with my modding applicationsAdd it from file → and specify the path to LOOT.
Open LOOT. Here you will see a bunch of different buttons.
All you need to know for now are 2 buttons:
Sort Plugins — sorts your plugins.
Update Masterlist — updates the data about how plugins should be sorted. Click it every time you launch LOOT to make sure there are no updates.
LOOT works based on a cloud database.
If your mod is not in that database, or if the mod is new, the program will place it somewhere random, usually at the very end or alphabetically. This can easily cause bugs.
If you want a specific mod to always load below another mod, even after pressing the Sort button, you need to configure Metadata.
This is the only way to make LOOT respect your rules.
Open the LOOT interface through MO2.
Find the plugin in the list that is being placed “in the wrong spot”.
Right-click the plugin and select Edit Metadata.
Go to the Load After tab.
Click Add New Row and enter the name of the mod .esp that should load above this plugin.
Click the save button icon.
Screenshot example:
For the patch:
Fort Dunstad - Immersive Laundry patch.espto work correctly, it must load after its “parent” plugins.
In the Load After list, we add:
Fort Dunstad.esp
Laundry.espIf the author writes in the instructions for their mod:
“Place this mod strictly after all retextures”
then do not rely on automatic sorting.
Go into the metadata, write the rules, and your modlist will be solid and stable.
I also recommend checking the comments on mod pages, especially for mods with a huge number of patches. People in the comments often share their load order.
If LOOT did not help and something strange is happening in the game, for example, a sword from a mod suddenly starts dealing 1 point of damage, then SLEEdit, also known as xEdit, comes to the rescue.
Launch SLEEdit through MO2.
Select all mods that may overwrite the sword.
You can find this in the game using these mods:
ConsolePlusPlus
ConsoleUtilSSE
More Informative ConsoleFind your sword in SSEEdit inside the required mods.
In SSEEdit, there are many categories where you can find the information you need. Essentially, SSEEdit is like an Excel table:
1 mod → 5 types of dataFor example:
Weapons
World
NPC
Outfit
Cell
Look at the right window. There will be columns there.
Each column is a mod.
The far-right column is what you see in the game.
If you see that a rebalance mod is on the left, but some random patch mod is on the right and overwrites the damage, then you have found the problem!
In SSEEdit, the one on the right wins.
To fix this, you either need to change the plugin load order or create a patch by copying and mixing the data you need from other mods.
Do not touch ESM files:
They should always stay at the very top.
Patches go at the end:
Any files marked as Patch, Fix, or Overwrite should be placed below their “parent” mods.
The same applies to LOOT rules, which you absolutely need to add for proper sorting.
The left panel priority should match the right panel:
If a mod’s plugin is placed at the very bottom, it is usually better if the mod folder in the left panel is also not overwritten by other mods.
This is not always critical, but paying attention to it is good practice.
Made changes? Check animations:
If you added a movement or weapon mod, make sure to run Nemesis / FNIS again.